Project Organization And Preparation For Work In Avid
Frame Rate
When creating a project, it is crucial to set the correct frame rate, as this parameter cannot be changed later.
Media Creation Settings
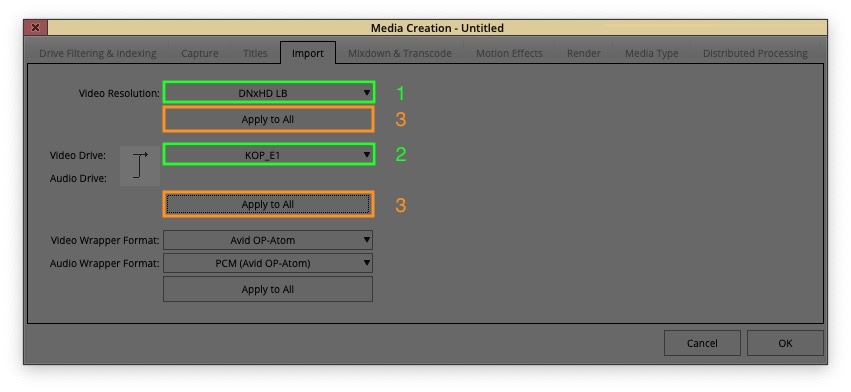
The first step after creating a project is to open the Import tab in the Media Creation settings and ensure the import settings are configured correctly. Specifically:
- Set the Video Resolution to match the format that will be used for the
proxy files(typicallyDNxHD LBorDNxHD SQ). - Ensure that all files (both "Video Drive" and "Audio Drive") are set to be imported into the project drive.
Once these parameters are set, click "Apply to All" under both the Video Resolution section and the Video/Audio Drive section. This ensures that the settings are applied across all tabs in the Media Creation panel.
Proxy Files Import
To import proxy files into Avid:
-
Place the proxy files into the appropriate numbered folder inside Avid MediaFiles →
MXF. -
When Avid is launched, it will automatically generate a database file in that folder
msmMMOB.mdb. -
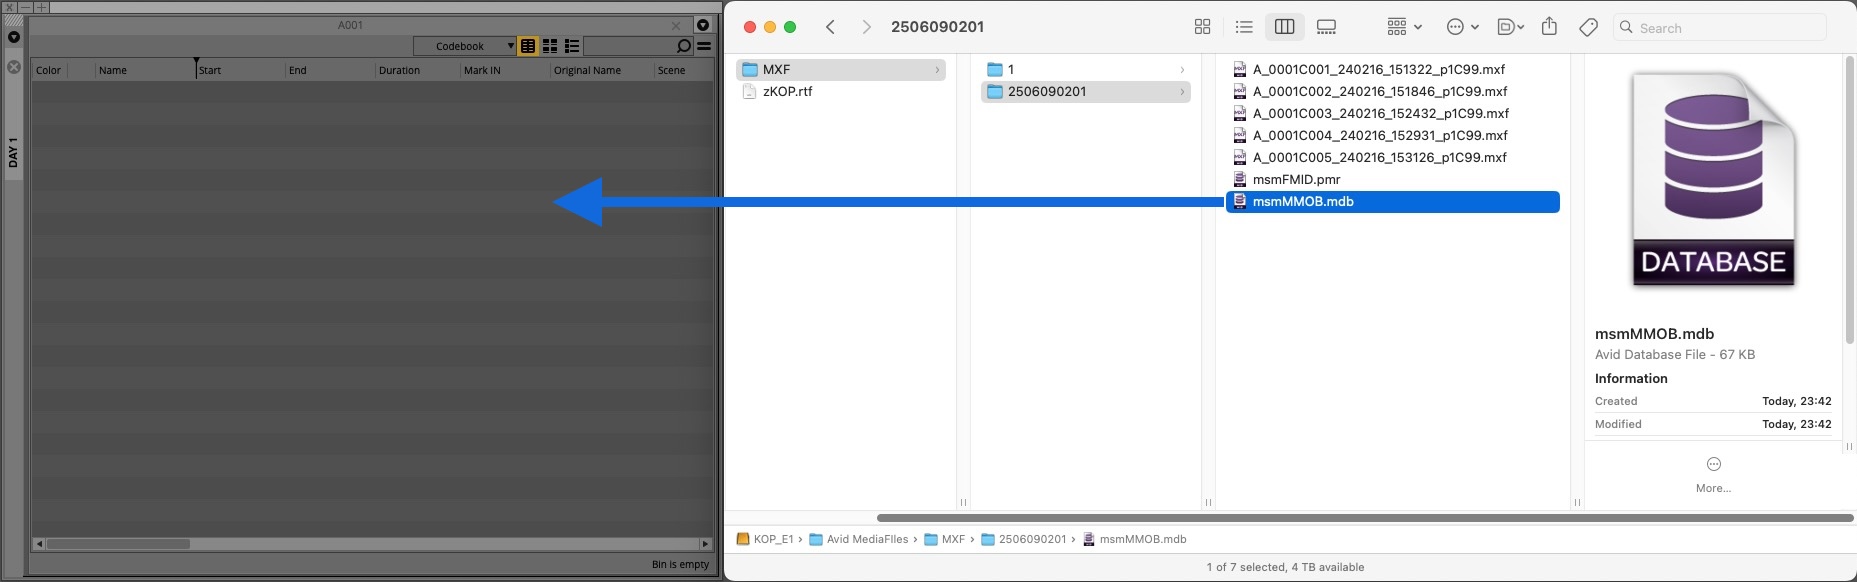
To bring the proxy clips into your project, simply drag the
msmMMOB.mdbfile into the appropriate bin. This will trigger Avid to import all media files from that folder into the project.
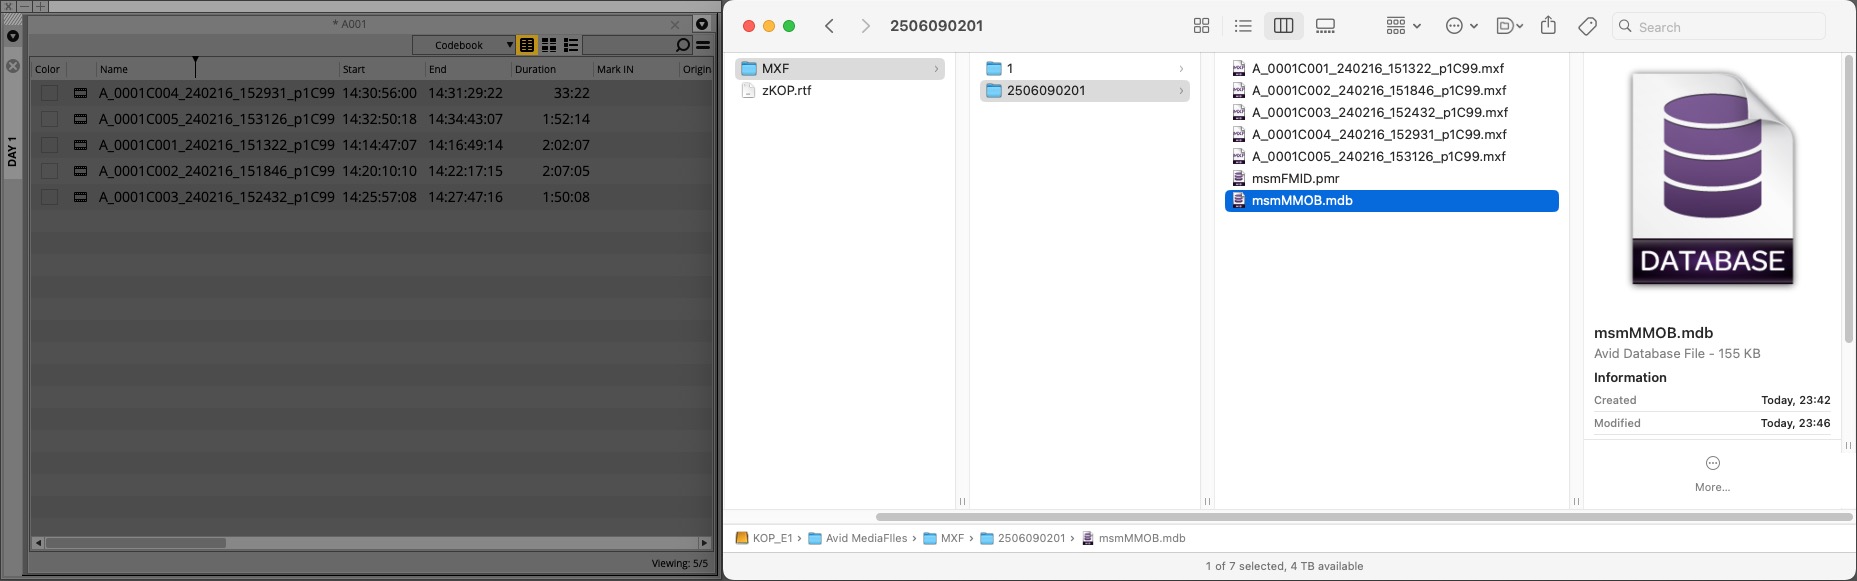
- If everything was correctly done, the master clips will appear inside the Avid bin.
Important
Sometimes, certain files may be corrupted, which prevents Avid from adding them to the media database. An error window will pop up during the scan of the MXF folder, offering to quarantine or ignore the problematic files. In such cases, you must immediately contact the DIT and request a reupload of the affected files.
Production Sound Import
To import Production Sound into Avid:
- Select all the
.wavfiles from the relevant folder.
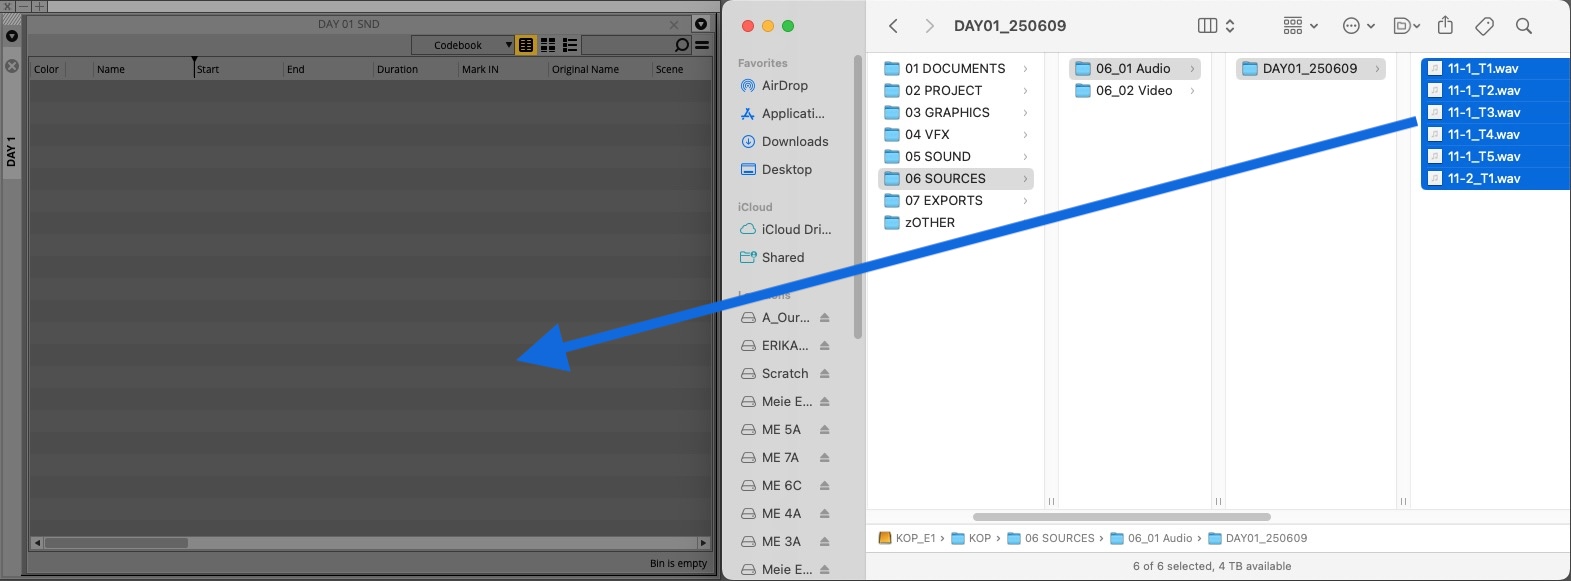
- Drag them into the corresponding bin in Avid.
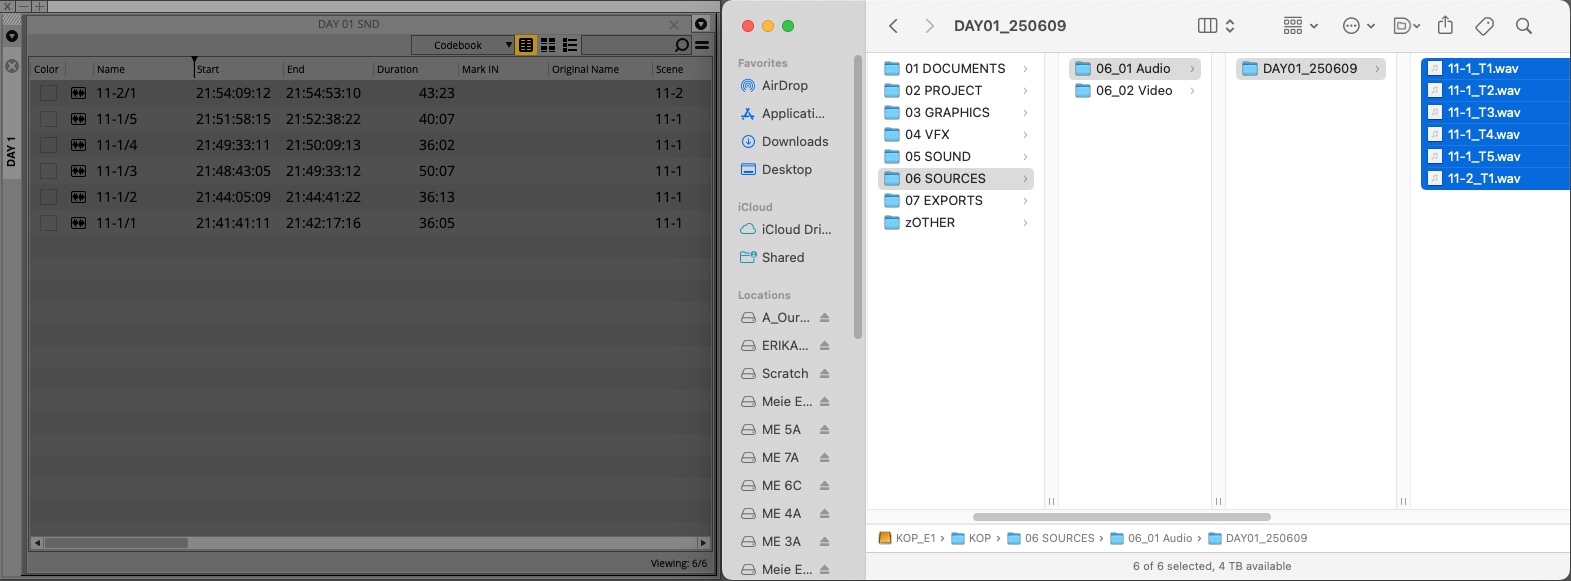 { loading=lazy }
3. In some cases, a pop-up window titled "Audio Start-Time Options" may appear during import.
- Make sure the frame rate matches the project’s frame rate.
- Then click "OK to All” to proceed with the import.
{ loading=lazy }
3. In some cases, a pop-up window titled "Audio Start-Time Options" may appear during import.
- Make sure the frame rate matches the project’s frame rate.
- Then click "OK to All” to proceed with the import.
Moving Audio MXF Files
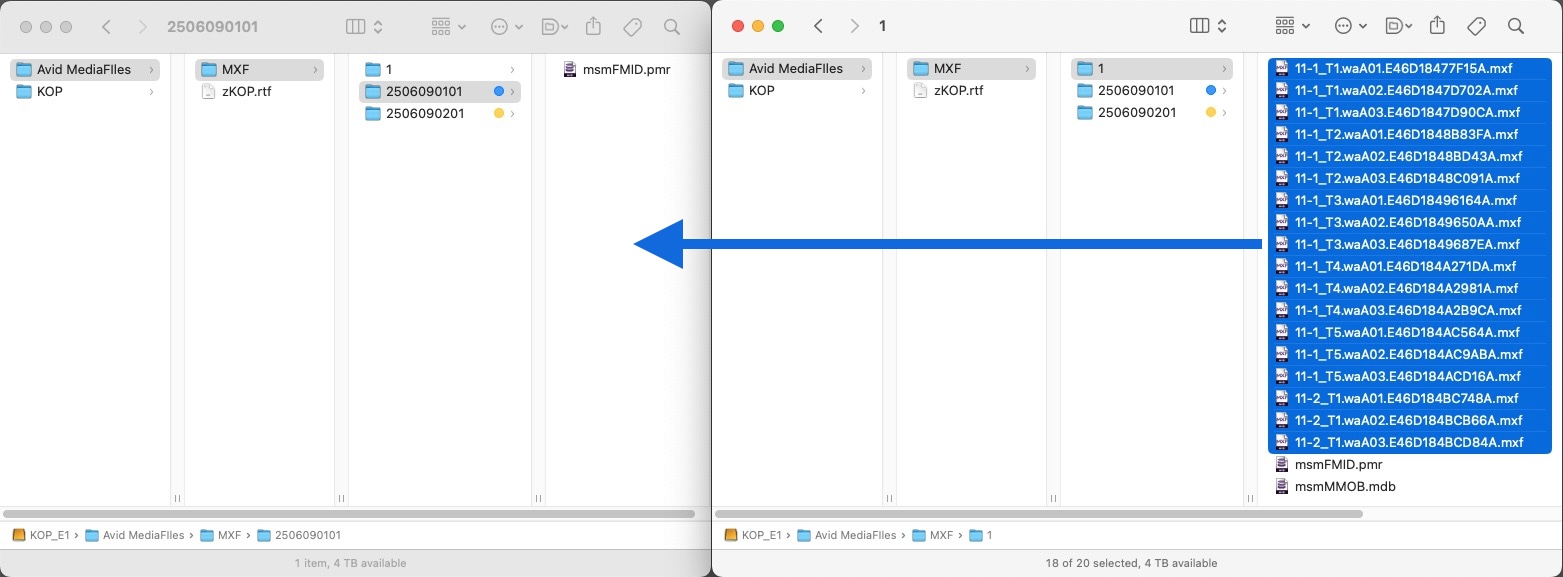
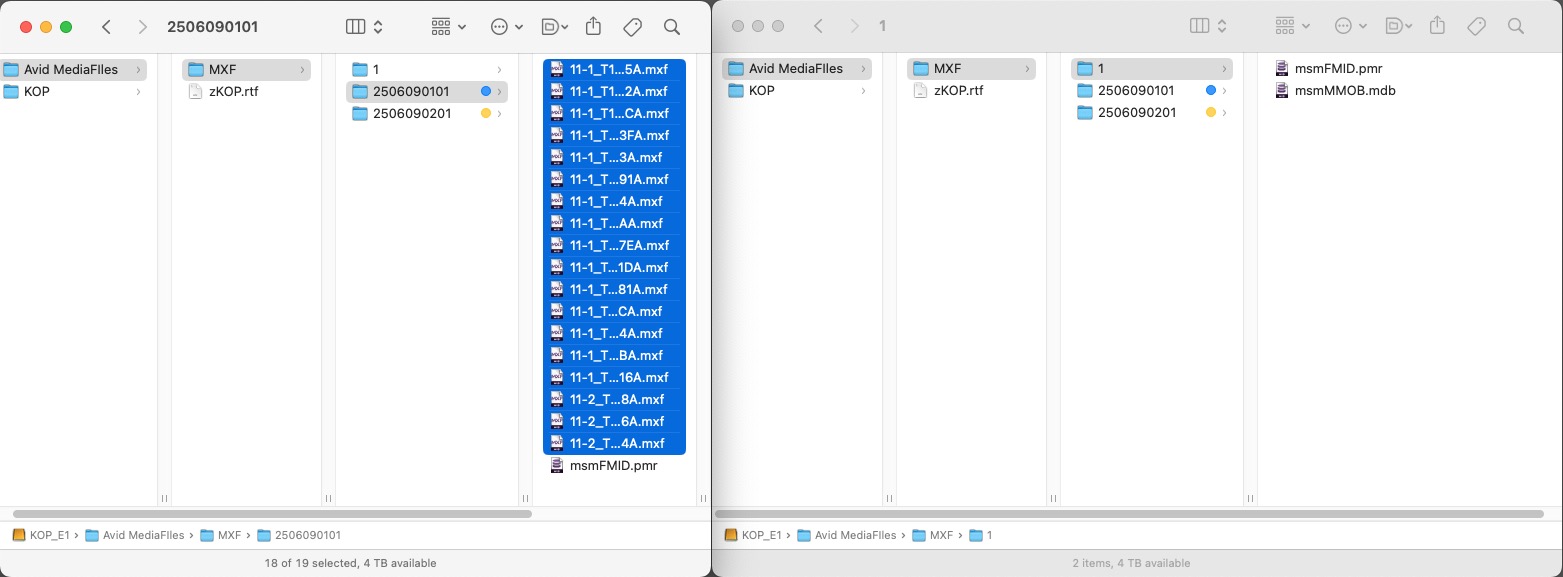
After the Production Sound has been successfully imported, Avid will generate audio MXF files in the default folder: "Avid MediaFiles" → MXF → 1
You must manually move these generated audio files into the correctly named folder according to the project’s naming convention (see section: Folder Naming Convention Inside the MXF Folder).
This ensures that the media is properly organized and can be easily tracked.
MXF Folder Tagging in Finder
As an additional organizational measure, apply yellow tags in Finder to all folders containing video files, and blue tags to all folders containing audio files.
This color-coding system helps quickly distinguish between video and audio assets at a glance.
Logging Media
Bin View
To log video material, use the custom Bin View called "Video Logging". To log audio material, use the custom Bin View called "Audio Logging". For scene bins, use the custom Bin View called "Scene".
You can download these custom Bin Views from here.
To import custom Bin Views:
- In Avid, go to
Settings→User. - Press
CMD + O(orFile → Open Setting File). - Navigate to the location of the
Codebook.xmlfile and open it. - A small window with the Codebook Bin View setting will appear.
- Drag the Codebook setting into your
Settings→Usersection.
Once imported, apply the Codebook Bin View to your bins by selecting it from the Bin View dropdown menu. This will ensure consistent and efficient logging of video material.
Logging Video Clips
Merging ALE File with Video Clips
If the DIT provides an ALE (Avid Log Exchange) file, you need to merge it with the video clips. Typically, a single ALE file is created for an entire shooting day.
Here’s how to do it:
- If the media is organized by camera cards, then move all video clips from the corresponding card bins into a temporary bin.
- Go to
Settings→User→Import Settings→Shot Log. - Make sure the option "Merge events with known master clips" is selected. This ensures the ALE metadata merges correctly with the existing clips.
- In the bin, select all the video clips.
- Then, drag and drop the corresponding
ALEfile into the same bin. Avid will match the ALE data to the master clips by tape and timecode, and additional metadata will appear in the bin columns. - If you organize video material by camera cards, then return the clips to their original bins to maintain project structure.
Clip Names
Rename all video clips using the following format: Scene-Shot/Take (e.g., 24-3/1 for Scene 24, Shot 3, Take 1).
In addition, append any relevant special markings found in the Editor’s Daily Log, such as:
PU: pick-up takeNG: not good200FPS: slow motion (high frame rate)*: circle takeFT: false takeMOS: no soundSER: rolling take (should be with number indicator, representing how many actions are done within one take, eg,SER2,SER6,SER9, etc.). You must always double-check how many times the action was performed within a rolling take, as the information in the Editor’s Daily Log may not always be accurate.A / B / C: camera letter if shot with multiple cameras- After creating a multicam clip, you must indicate which cameras were used by adding them to the clip name, separated by a dash. For example: 24-3/1 A-B-C.
Example:
24-3/1*: Scene 24, Shot 3, Take 1, circle take24-3/1 NG: Scene 24, Shot 3, Take 1, not good24-3/1.SER5 MOS: Scene 24, Shot 3, Take 1, rolling take – series of 5 (5 actions within one take), no sound24-3/1 PU: Scene 24, Shot 3, Take 1, pick-up take24-3/1 A: Scene 24, Shot 3, Take 1, shot on camera A24-3/1 B: Scene 24, Shot 3, Take 1, shot on camera B
Metadata Columns
In addition to renaming clips, make sure to fill in the following bin columns for each clip:
Scene: scene number (e.g., 24)Take: take number (e.g., 1)Camroll: card or roll number (e.g.,A017)Camera:camera designation (e.g.,A,B,C)Shoot Date: inISO format:YYYY-MM-DD(e.g.,2025-06-09)Shoot Day: two-digit format representing the production day (e.g.,01,02, etc.)Character: name(s) of the character(s) present in the shot. If multiple characters are visible, list them all, separated by commas.Shot Size: use standard abbreviations according toRoy Thompson:XLS,VLS,LS,MLS,MS,MCU,CU,BCU,ECU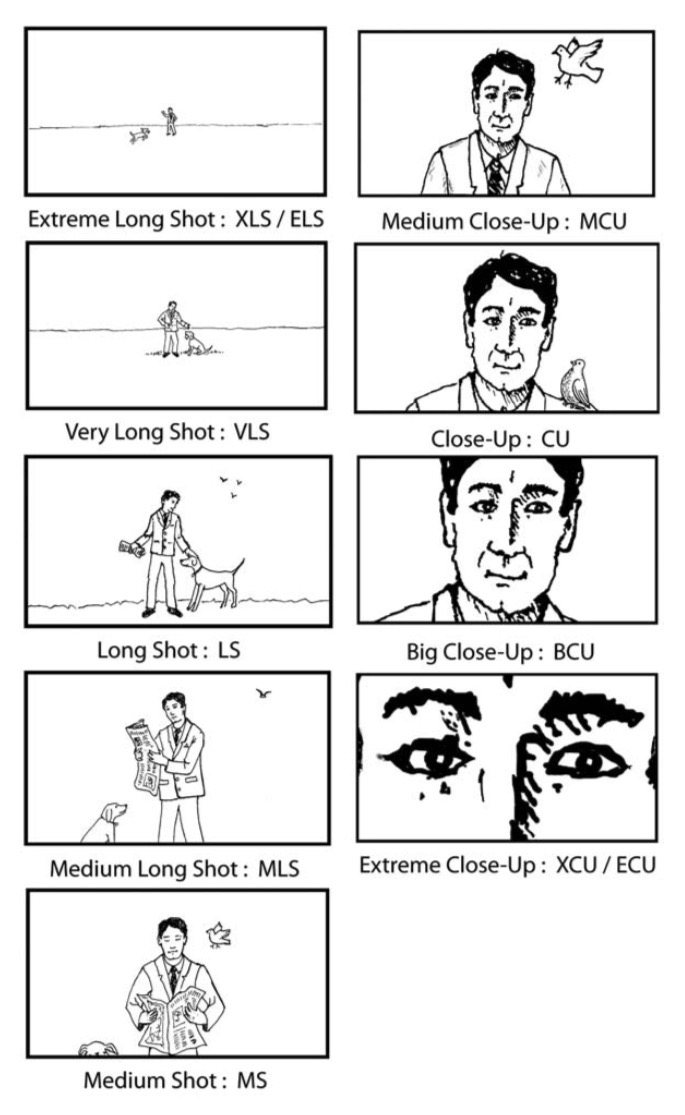
Description: taken from theEditor’s Daily Log, but remove the shot size notation if presentScript Notes: taken directly from theEditor’s Daily Log
Clip Colors
Next, assign a yellow clip color to all video clips to visually distinguish them as master clips in a bin.
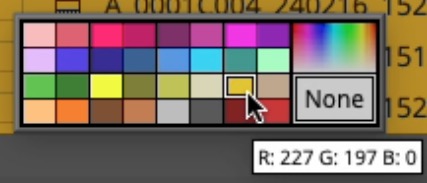
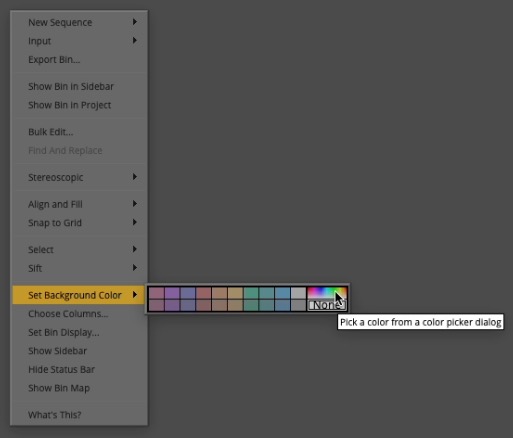
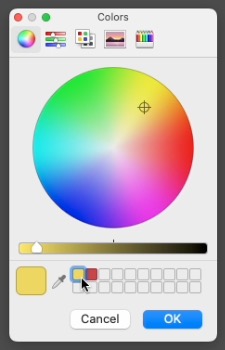
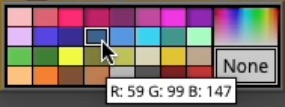
Then, set the "bin background color" to yellow as well (color code: R: 236, G: 216, B: 97) to clearly indicate that the clips in this bin are master clips and not subclips.
🎨 Tip
You can use the color picker tool to pick the correct color directly from this image.
As the final step, after all files have been correctly renamed and double-checked, select the header of the Name column, press CMD + D, and copy this data into the Original Name column.
Frame View Organization
Next, follow these steps to finalize the visual organization of the video sources bin:
- Switch to "Frame View" in the bin.
- Maximize clip icon size by pressing
CMD + Lseveral times. - Press
SHIFT + Zto automatically rearrange all clips and fit them within the visible bin area. - Select "all clips" in the "bin".
- Hold down the
"2"key (the one above the letters) to scroll the thumbnails forward until each clip displays a representative frame.
Logging Audio Clips
Clip Names
Make sure that all audio clip names follow the format: Scene-Shot/Take (e.g., 24-3/1 for Scene 24, Shot 3, Take 1).
Note
If the naming does not match this format, rename the clips accordingly to ensure consistency and proper synchronization with the video files. Ensure that you remove any unnecessary zeros and other elements from the names.
Metadata Columns
- In the bin, click on the header of the Start column to select the entire column.
- Press
CMD + Dto bring up the Select dialog. - In the dialog, choose Sound TC as the destination column and confirm. This will copy the Start timecode into the Sound TC column.
- Then, click on the Tape column header to select it.
- Press
CMD + Dagain, and choose Soundroll as the destination column. Confirm to copy the Tape values into the Soundroll*" column.
Important
This step is essential for maintaining correct metadata during audio turnovers.
In addition, make sure the following metadata columns for audio clips are filled out and match the values used for the corresponding video clips:
SceneTakeShoot Date(inYYYY-MM-DDformat)Shoot Day(in two-digit format, e.g.,01)
As the final step, after all files have been correctly renamed and double-checked, select the header of the Name column, press CMD + D, and copy this data into the Original Name column.
Clip Colors
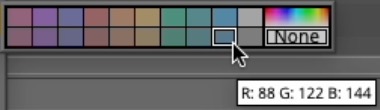
Assign a 🔵 blue clip color to all audio clips.
Additionally, set the bin background color of the audio bin to 🔵 blue.
Audio and Video Synchronization
- Create a temporary bin for syncing purposes.
- With
ALTheld down, drag all relevant video and audio clips into this bin. This creates clones, so the initial clips stay in their original bins. - In the sync bin, select all video and audio clips, right-click, and choose "AutoSync".
- In the pop-up window:
- Set "Sync Clips Using" to Source Timecode
- Check "Include audio from audio-only clips"
- Set "Include audio from audio-only clips" to:
- "Range Start":
A1 - "End":
A2
- "Range Start":
- Click "OK"
- If syncing via source timecode fails (e.g., due to mismatches or missing
TC), switch to syncing manually by using "Waveform Analysis" or "Inpoints".
After a successful sync, you’ll get subclips.
Remove the yellow color from the subclips. The yellow label should be used only for master clips located in the SOURCES folder.
The cloned master clips (video and audio) can now be safely deleted from the temporary bin (they still remain in their original bins).
Then, move the synced subclips into their corresponding scene bins.
Important
Sometimes the audio recorder stops in the middle of a take, and the sound recordist restarts it. In such cases, a single video clip might have two (or more) corresponding audio files. You must synchronize the video with each audio file separately.
This means the take should be given a sub-number. For example, if take 24-3/1 has two audio files, the resulting two subclips should be named: 24-3/1.1 and 24-3/1.2.
Important
It’s also important to place any relevant Wild Tracks, Room Tones, and Production SFX into the scene bin. However, before doing so, you must create subclips from them — do not place master clips directly into the scene bin.
Important
Sometimes, during the shooting of rapid (high-speed) shots, sound is also recorded in parallel. In such cases, you should place the rapid shot into the KEM Roll, apply a Timewarp effect to bring it to real-time speed, and then manually sync the recorded audio to it using the clap as a reference.
Scene Bins Preparation
Scene Bins Frame View Organization
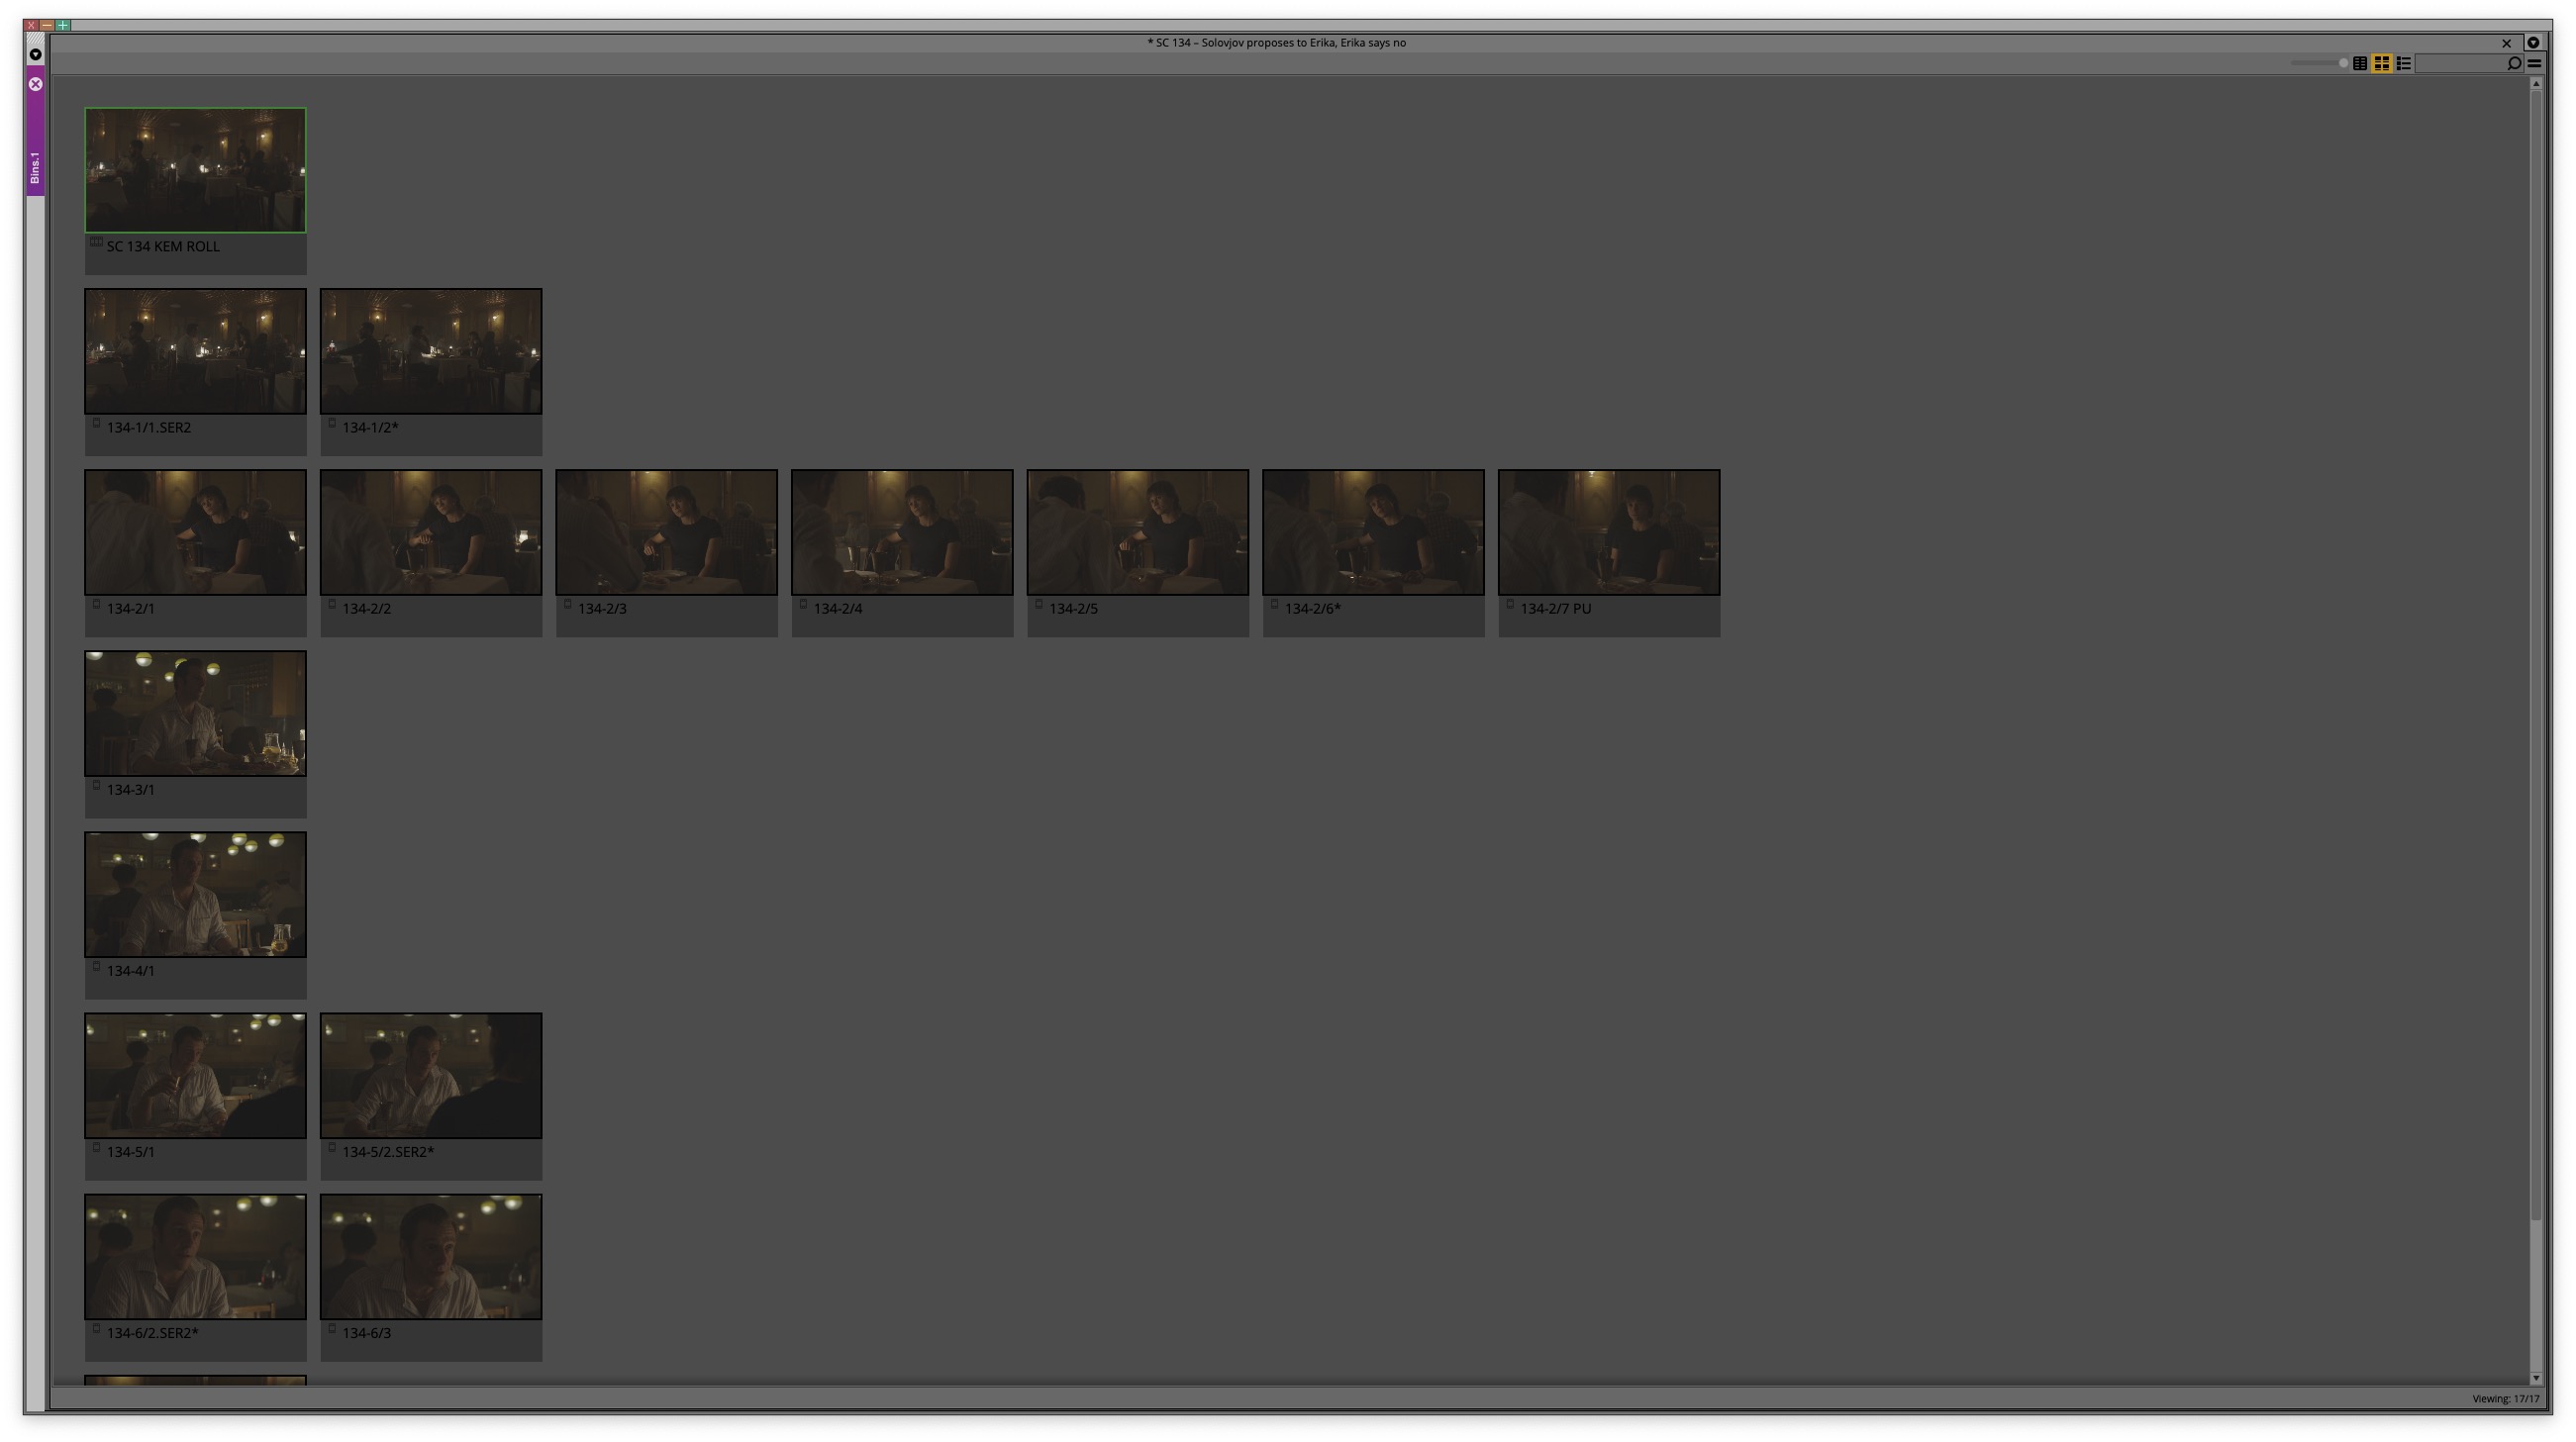
Switch the bin to "Frame View" mode. Maximize clip icon size by pressing CMD + L several times. Then, organize the synced subclips so that each setup (shot) is placed on its own horizontal row:
- all takes of the first shot go in the first row
- all takes of the second shot go in the second row
- and so on…
🎞️ Tip
This layout provides a clear visual structure of each setup and its corresponding takes, making it easier to navigate during the edit.
Important
When working in Frame View, the clips in the bin should be arranged in the order of story progression within the scene, not in numerical order. Sometimes the scene is shot out of sequence, with the end filmed first. Organizing the clips this way makes it easier to navigate the material logically within the scene bin.
Color Coding
Mark the subclips with the following clip colors for quick visual identification:
- Circled takes:
Green - False takes:
Red - Slow-motion takes:
Blue
Setting Representative Frames
To set a representative frame for each subclip:
- Select all clips in the bin.
- Hold down
ALTanddouble-clickon any one of the selected clips. This will open a Pop-up Monitor for each selected clip. - For each Pop-up Monitor:
- move the playhead to a representative frame.
- press
Ito set an In-point. - press
CMD + Wto close the monitor and move to the next one.
- Once all monitors are closed, select all clips in the bin again.
- Press
Q(Go to IN) — this will apply the representative frame to each clip in Frame View.
Setting Start and End Markers
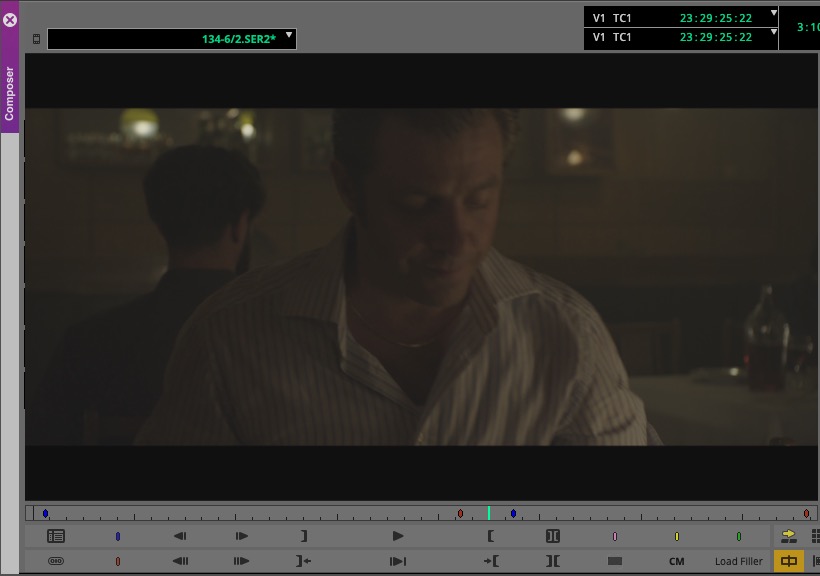
Next, set Start and End markers on all video clips to clearly define usable sections of each take:
-
Start Marker
- Color:
🔵 Blue - Place it immediately after the “Action” call or visual cue (e.g., actor enters the frame).
- Color:
-
End Marker
- Color:
🔴 Red - Place it just before the "Cut" call or visual end of the action.
- Color:
-
Rolling Takes
- If the clip contains multiple series of takes without stopping the camera, repeat the process for each segment:
- Set a 🔵 blue marker at the start of each series.
- Set a 🔴 red marker at the end of each series.
- If the clip contains multiple series of takes without stopping the camera, repeat the process for each segment:
Important
Sometimes the action in the shot doesn’t start immediately. For example, after the “action” cue, there might be a delay before the character enters the frame. In such cases, if nothing significant is happening visually and there’s no important story-related audio during that time, you should place the Start marker not right after the “action” cue, but just a moment before the character enters the frame.
Creation of KEM Roll
- Select all clips in the bin.
- Press
Gto clear all IN and OUT points. - Hold down
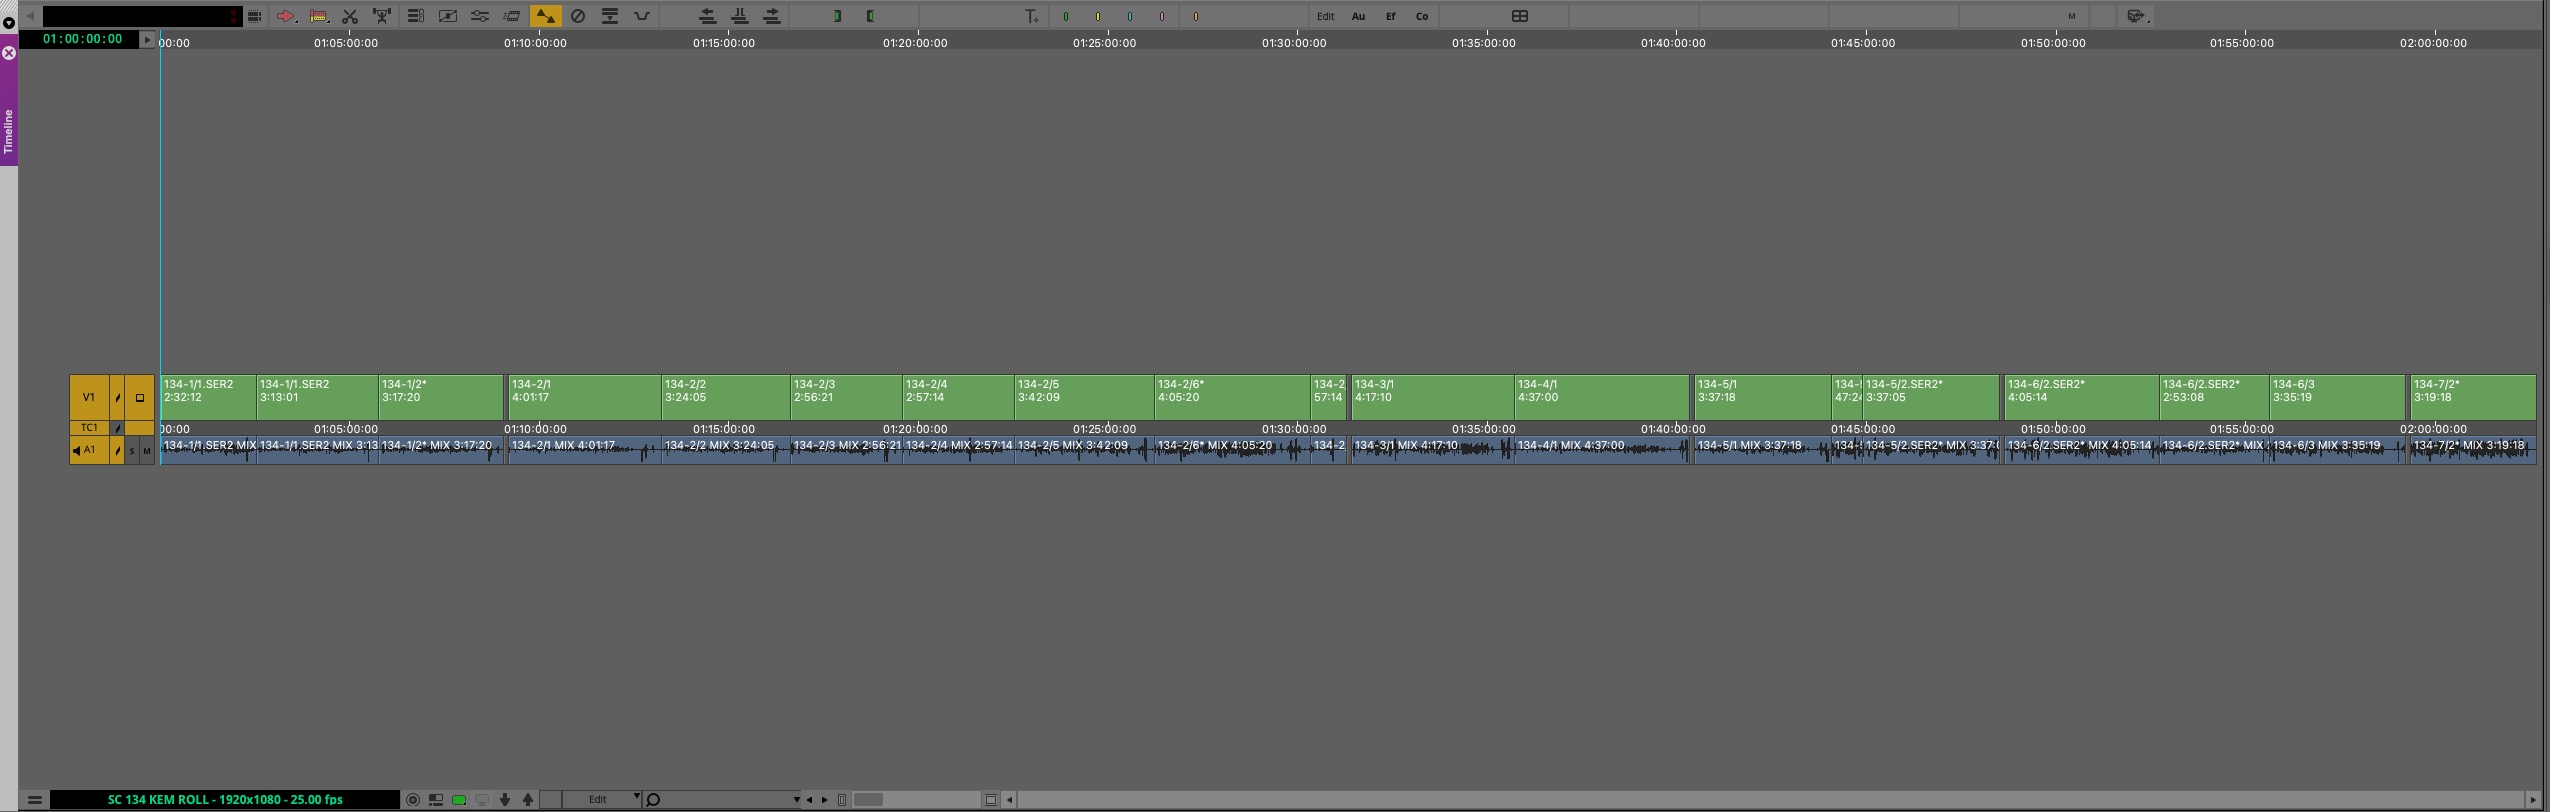
ALTand drag the selected clips into the "Program Monitor". This will automatically create a new sequence in the bin. - Name the sequence using the following format:
SC [Scene Number] KEM ROLL(e.g.,SC 85 KEM ROLL). - Assign a 🟣 purple clip color to the sequence for easy identification.
Cleaning the KEM Roll
Go through the sequence and remove the unwanted portions between each End and the next Start marker.
Use the Mark Markers function to quickly set IN and OUT between two markers:
- You can add this function to your keyboard via Command Palette (
CMD + 3), then map it to a key (e.g.SHIFT + T). - Press
SHIFT + Tto mark the section. - Press
Xto extract the marked area.
Important
The clips in the KEM Roll should be arranged in the order of story progression within the scene, not in numerical order. The same way they are organized in the bin in the Frame View mode.
Tip
You can automate this process further using tools like Keyboard Maestro, which can chain these steps together for quicker operation. Here is my macros.
Separating Setups Visually
After trimming, insert filler between different setups to separate them visually:
- Use a 2-second filler as a standard separator. If the KEM Roll is particularly long, a single 2-second filler may not be enough for clear visual separation between setups. In that case, insert the 2-second filler multiple times (e.g. 2-3 times in a row) to create a more noticeable gap.
- Place the playhead between two setups and press
V(Splice-In) to insert the filler.
Creation of Stringout
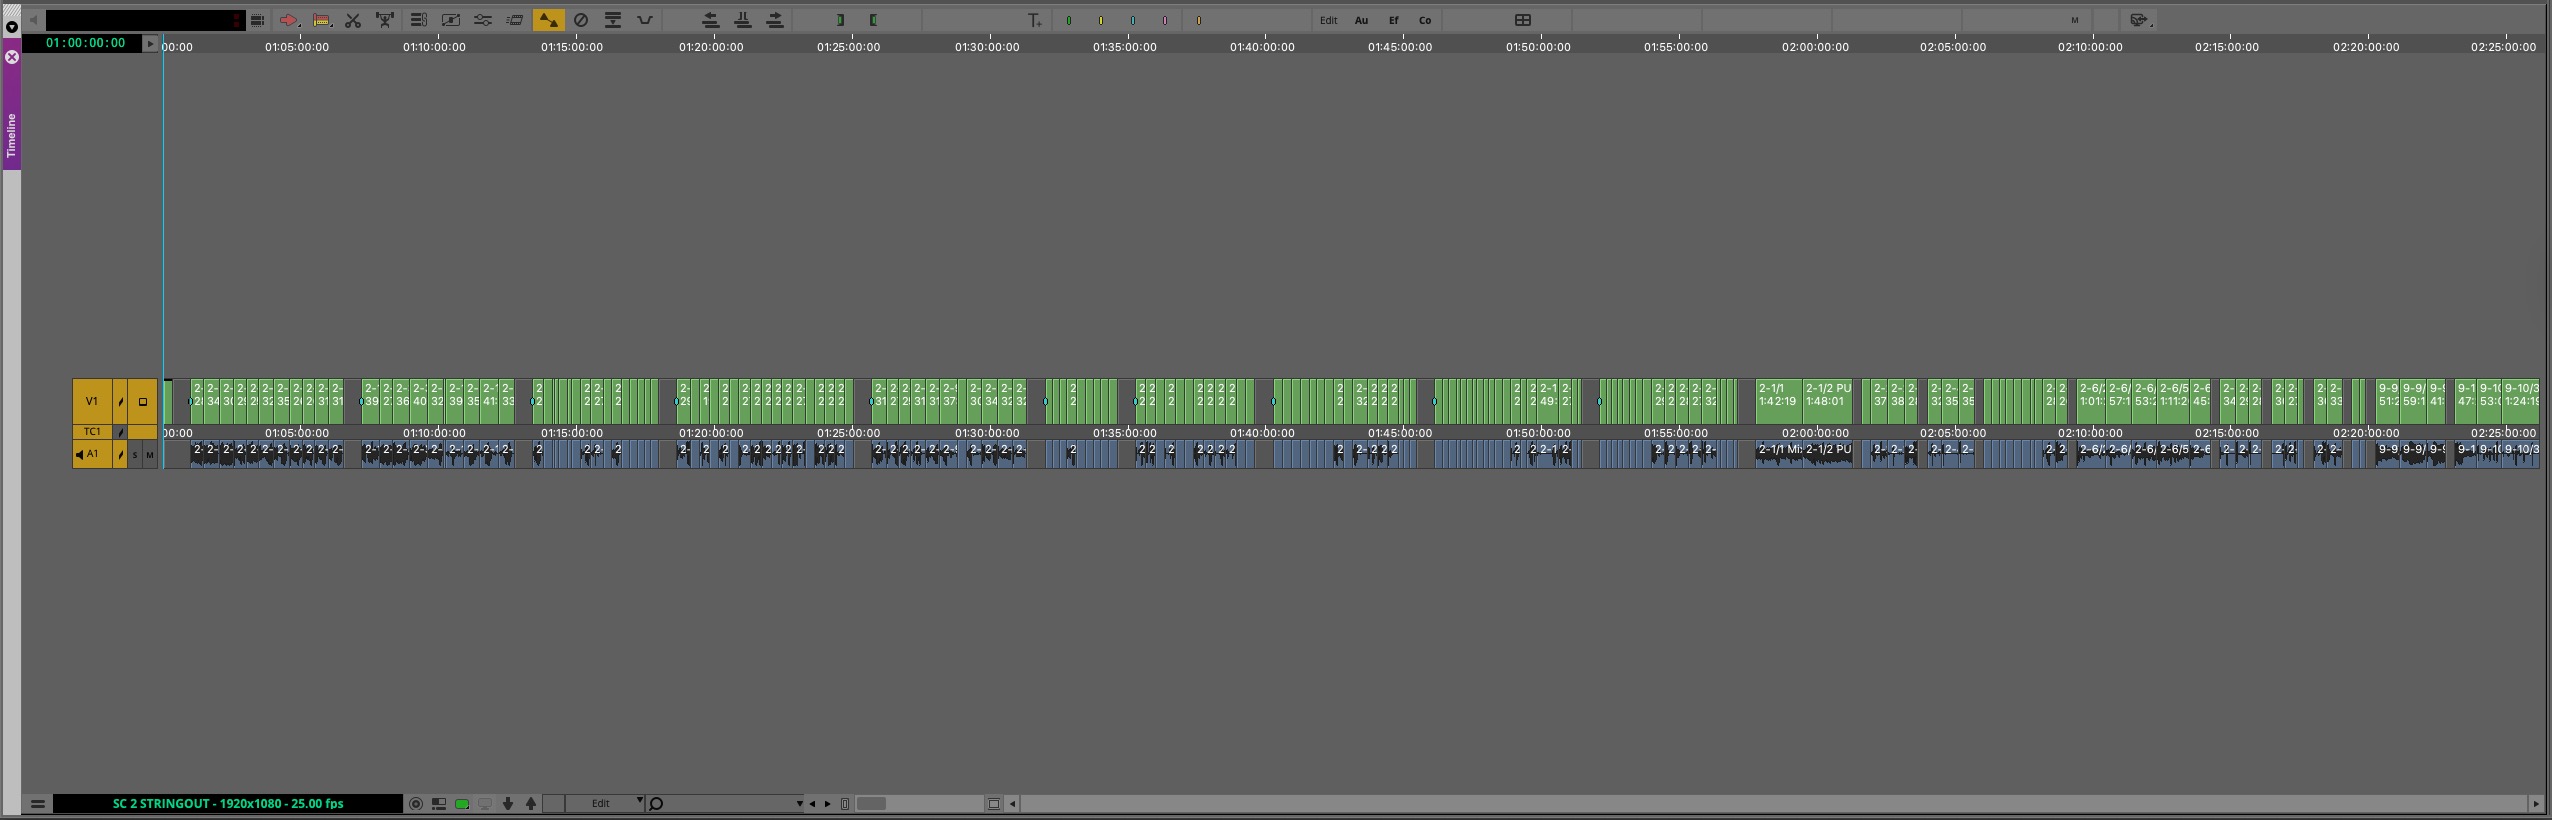
A Stringout is especially useful for long dialogue scenes, where reviewing all performances in parallel helps with editing decisions.
It makes sense to use the KEM Roll as the foundation for creating the Stringout.
- Open the KEM Roll for the scene.
- Go through the timeline and from each take extract 1–3 lines of dialogue (preferably the same lines across all takes to allow performance comparison).
- Copy those excerpts and paste them into a new sequence, placing them one after another in the same order as they appear in the KEM Roll.
- After assembling the first block of excerpts, insert a 2-second filler (or more) as a visual break.
- Then proceed to select the next 1–3 lines from each take and place them after the filler.
- Repeat the process until the full scene is covered.
- On the first clip of each new block, add a ⬤ cyan marker.
- In the marker’s comment field, write the line of dialogue that starts this block. This makes it easier to navigate the Stringout and quickly identify which part of the scene each section covers.